When I review images in Lightroom after a photo shoot, I often come across a candidate for conversion to black and white (grayscale for you purists). After all, photographs were black and white until color film was invented in 1907. The first thing I do in the Develop module when I see an image with strong contrast is press V. This converts the image to black and white and the HSL/Color panel becomes the B&W panel.
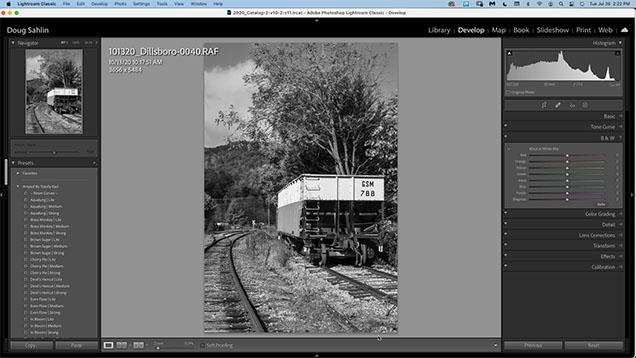
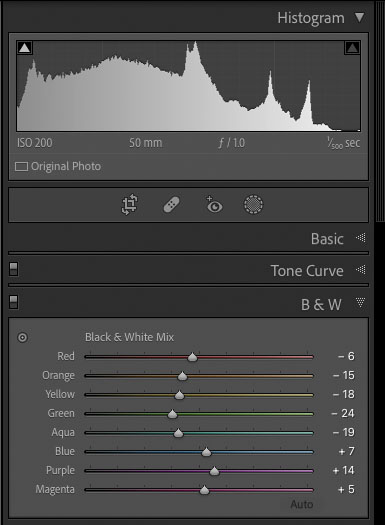
Then I click Auto in the B&W panel. Lightroom optimizes the settings based on the color data in the original image. That’s right, your black and white conversion still contains color data. I prefer a dark sky when I convert landscape images to black and white, so I click the TAT (Targeted Adjustment Tool) in the upper left corner of the panel, and drag down in the sky until what I see is what I like.
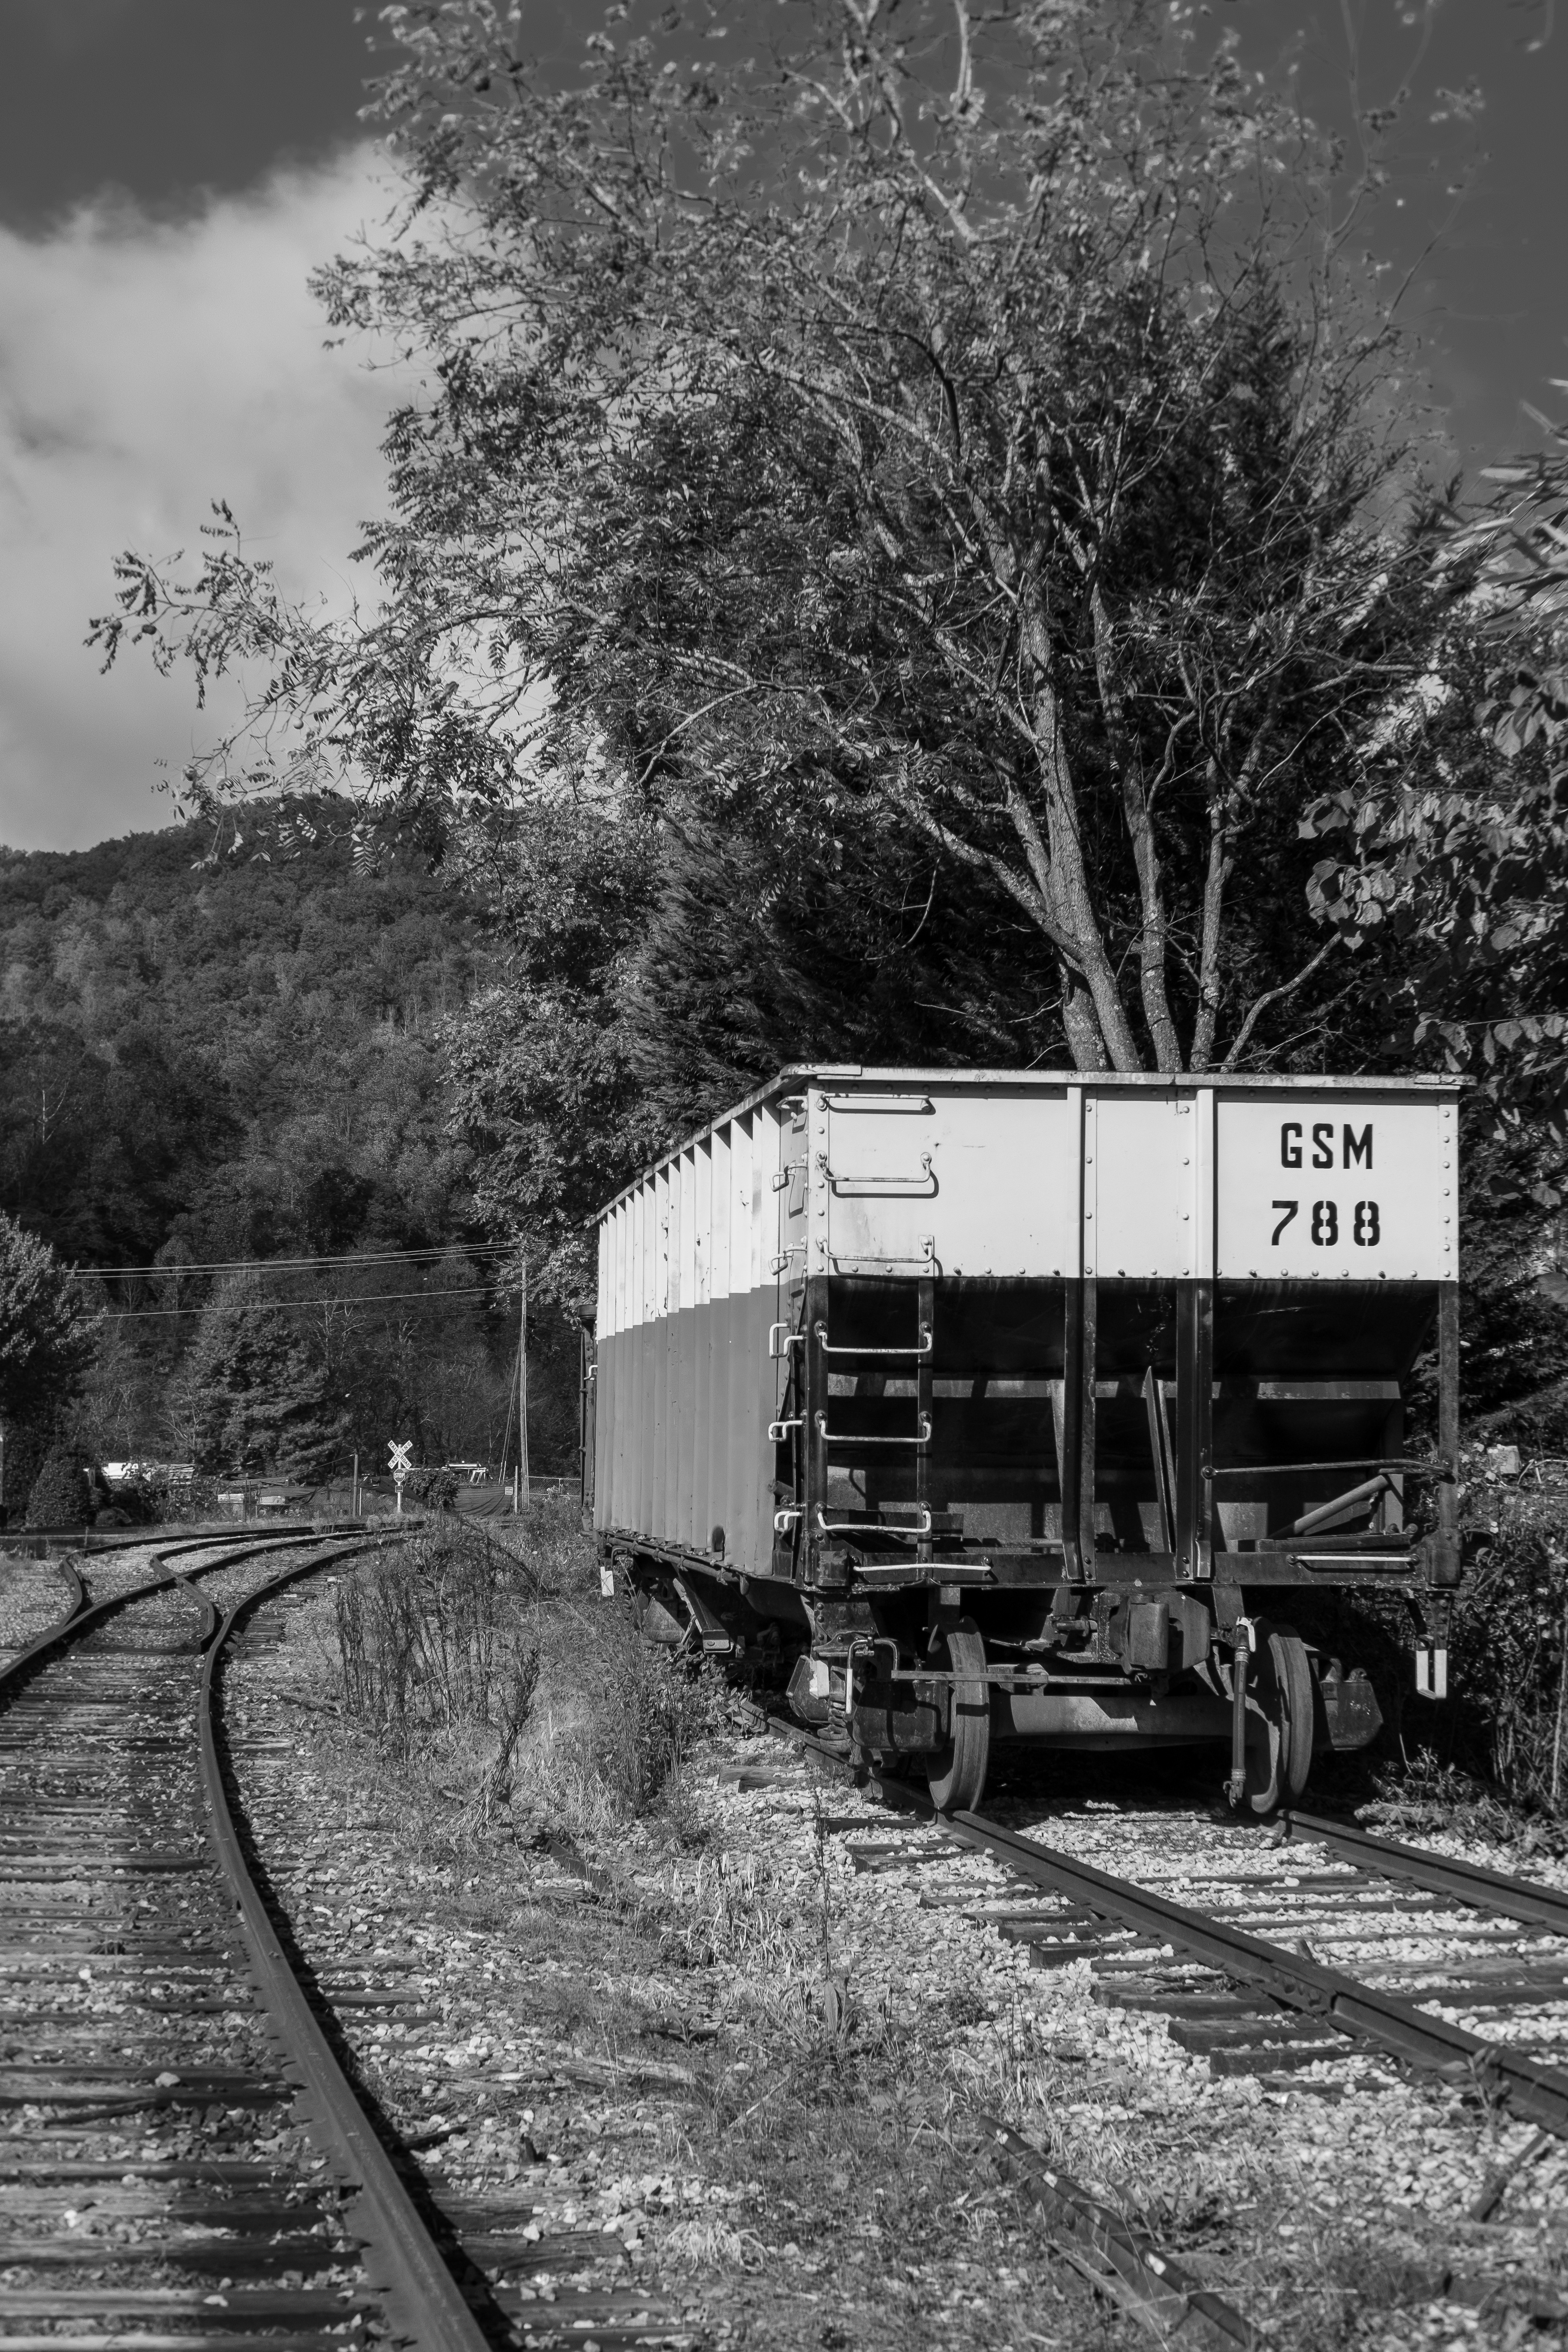
The following image was exported from Lightroom after conversion.
But wait, there’s more. For a really punchy black and white image, I use Silver Efex Pro 3, which is part of the DXO Nik Collection. The software offers more options and a ton of presets.
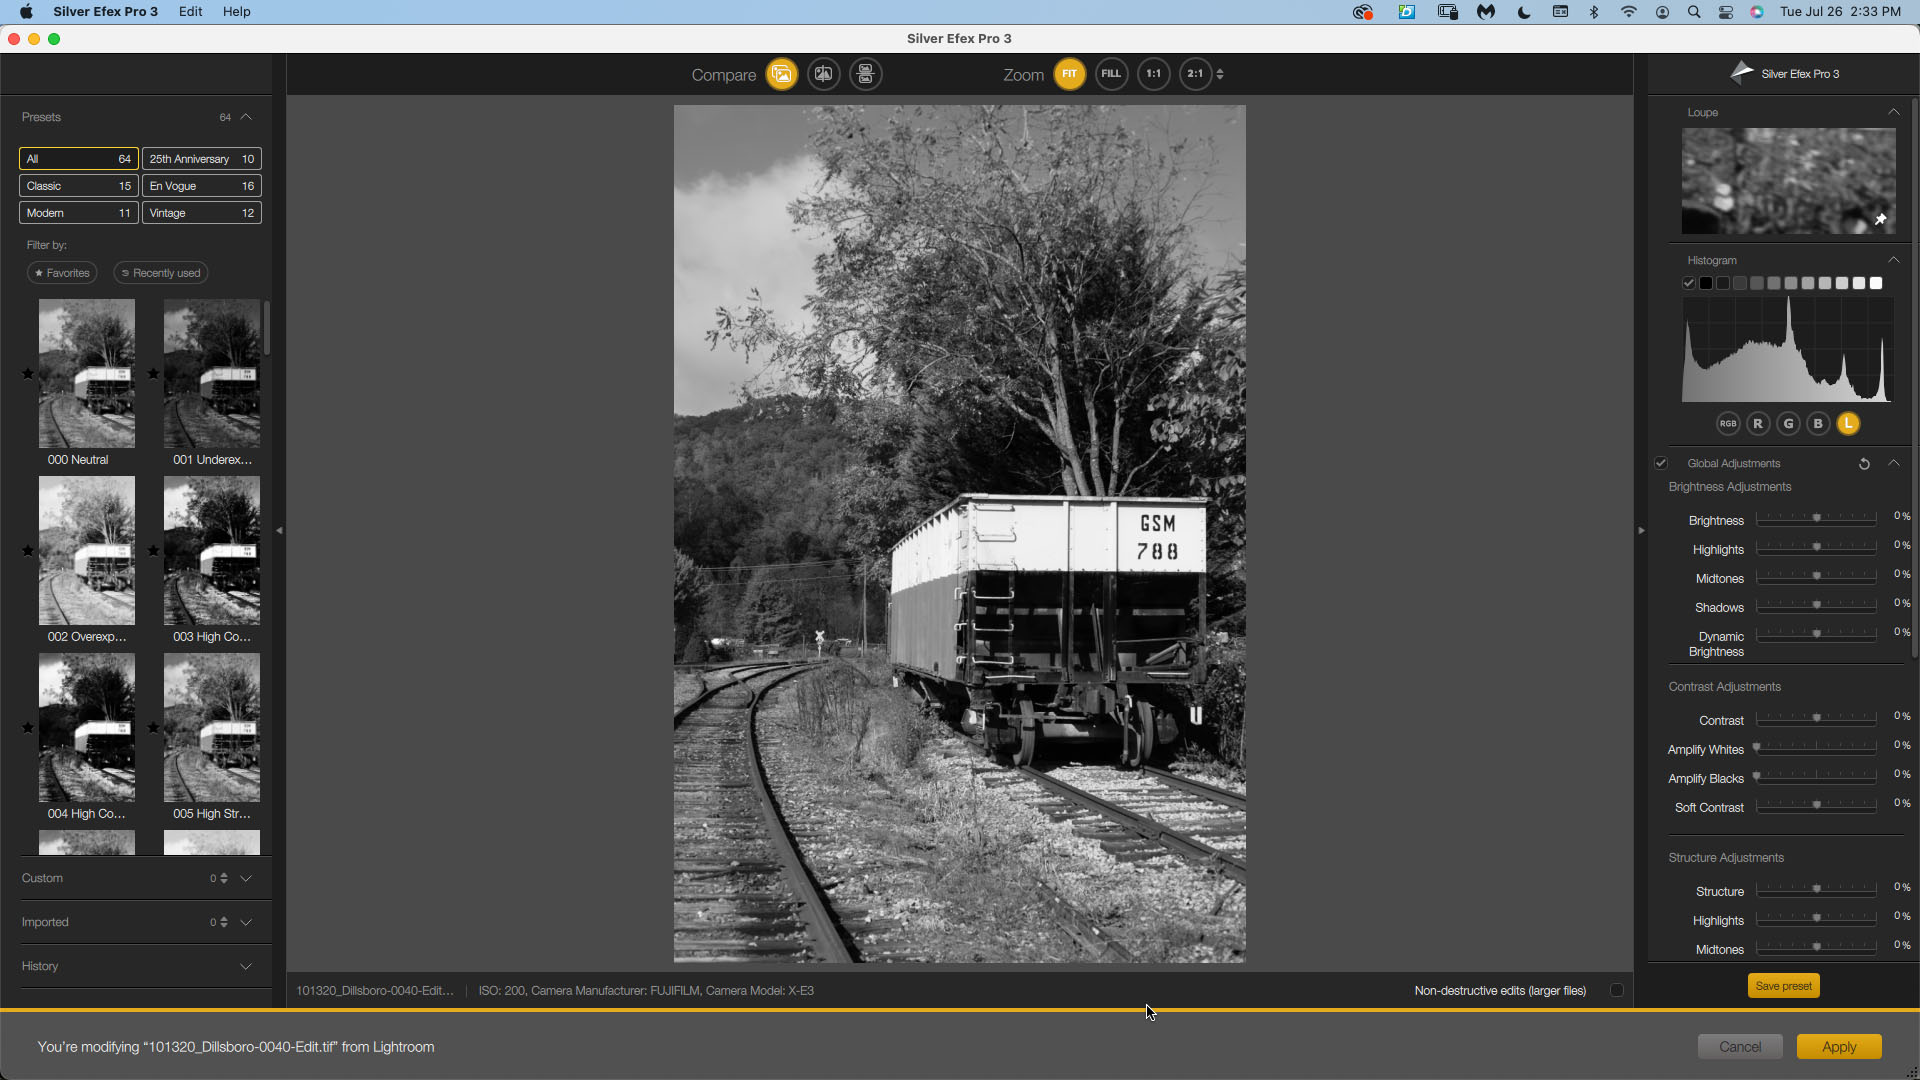
The following image is the one I converted in Silver Efex Pro 3. A trail version of the Nik Collection can be downloaded from DXO’s website: Nik Collection.

Recent Comments