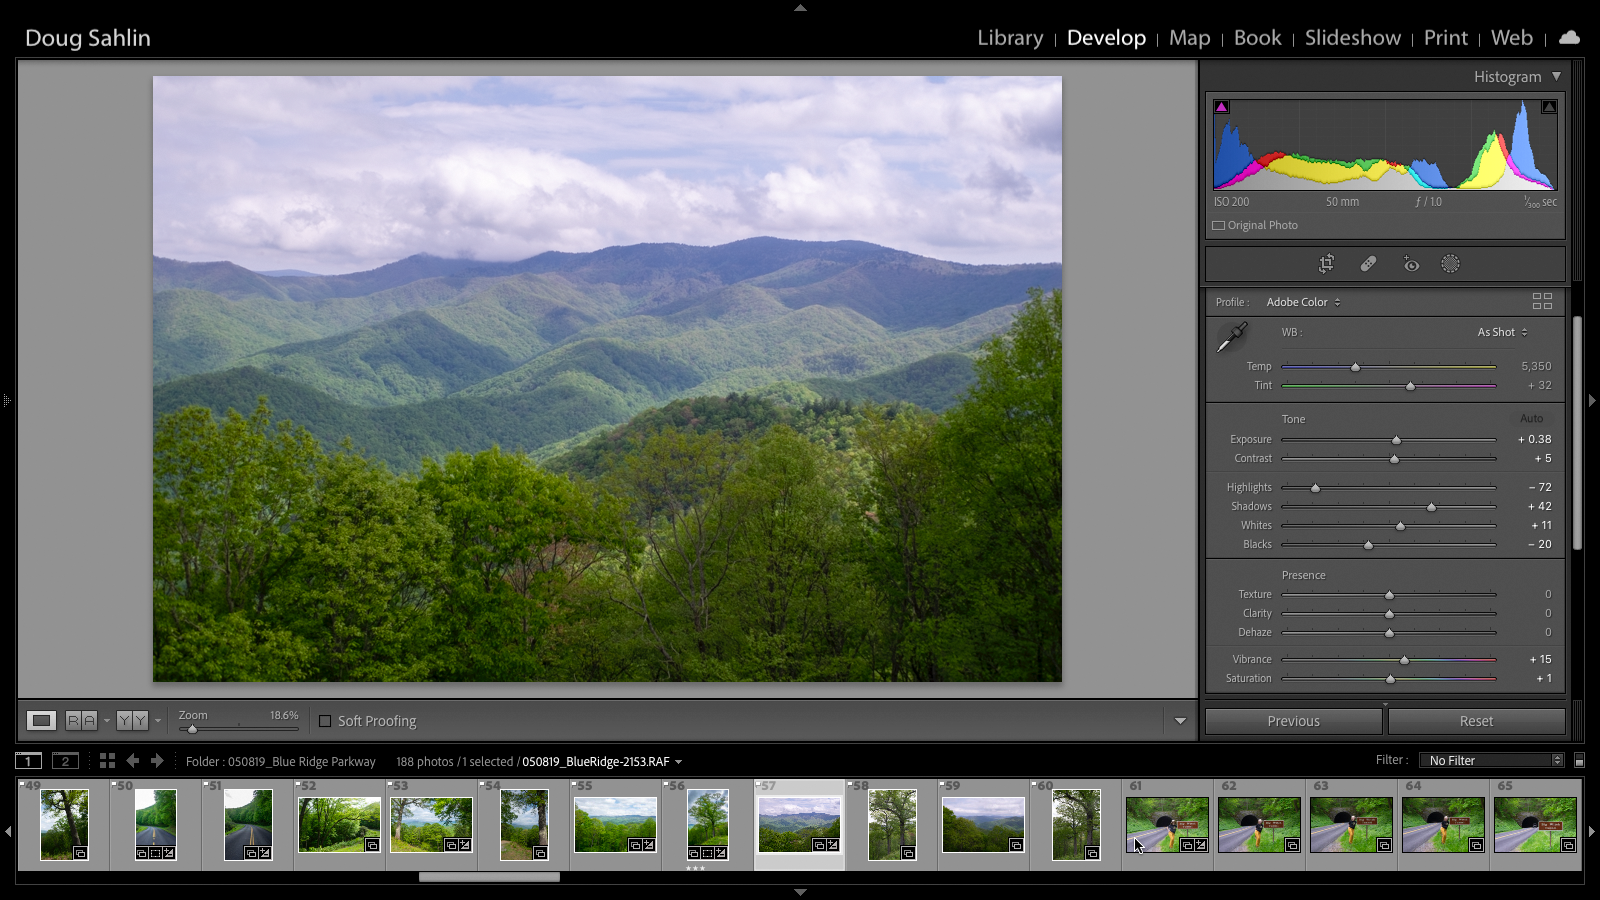
1. In the Basic panel of the Develop module, click the Auto button.
Lightroom applies settings that often hit the nail right on the head and produce a great image. Sometimes, not so much.
2. Tweak the settings.
You know what was in front of you when you captured the image. Tweak the settings until the image looks like what you saw through the viewfinder. With this image, I lowered the Exposure. Lightroom often increases the exposure too much.
3. Adjust the sky.
When you capture an image, your camera adjusts all tonal ranges. But the sky is often overexposed. To adjust the sky, you first need to select it.
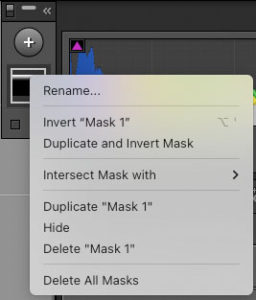
4. To select the sky, click the Masking button (the 4th button below the Histogram).
A drop-down menu appears showing you masking options.
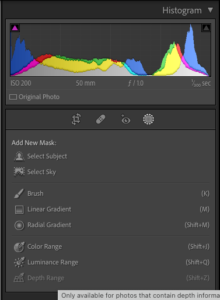
5. Click Linear Gradient.
A linear gradient applies changes to the area selected, the greatest changes at the top gradually tapering off to zero at the bottom of the selection.
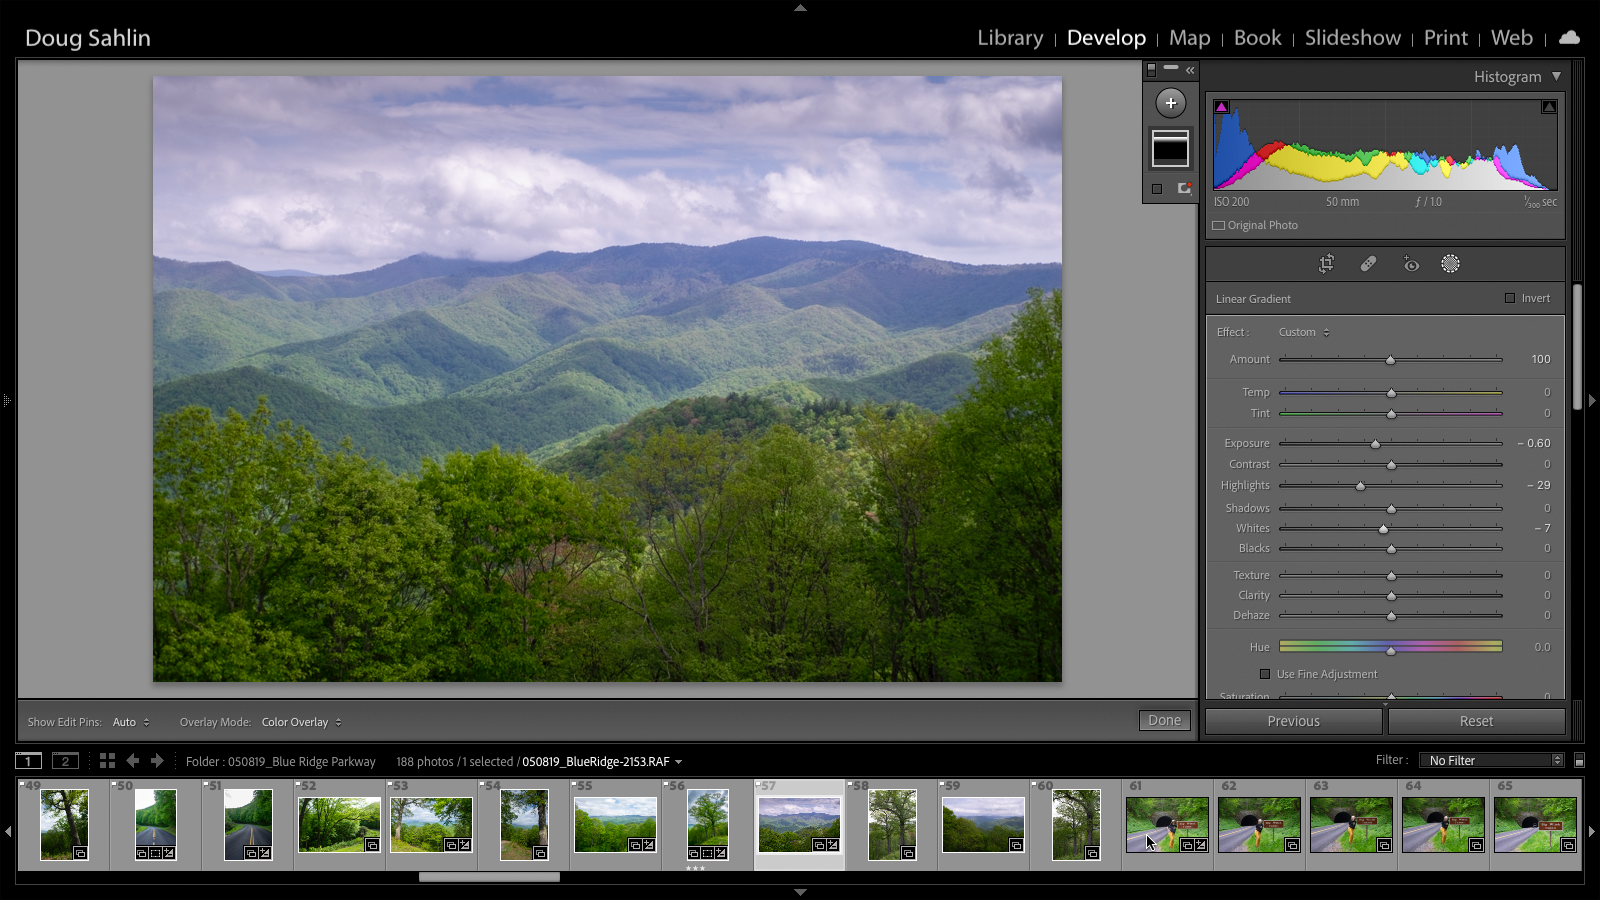
6. Hold the Shift key while dragging the tool from the top of the sky to the bottom.
Holding down the Shift key keeps the tool parallel to the top of the image.
7. Release the tool, then release the Shift key.
Lightroom applies a mask to the sky. The mask is designated by a red overlay.
8. Decrease the Exposure.
A little goes a long way. Your goal is to darken the top of the sky.
9. If the sky has clouds, decrease the Highlights and Whites settings.
This makes the clouds pop.
At this stage, the foreground may need tweaking. In this case, I want to darken the foreground slightly, so I right-click the linear gradient, and choose Duplicate and Invert Mask from the pop-up menu. You could do the same thing if you selected the sky.
10. To make the foreground pop, I decrease the Exposure slightly, and increase the Shadow value.
- Remember: When you create a mask, any change you perform is applied to the masked section only.
11. Click Done.
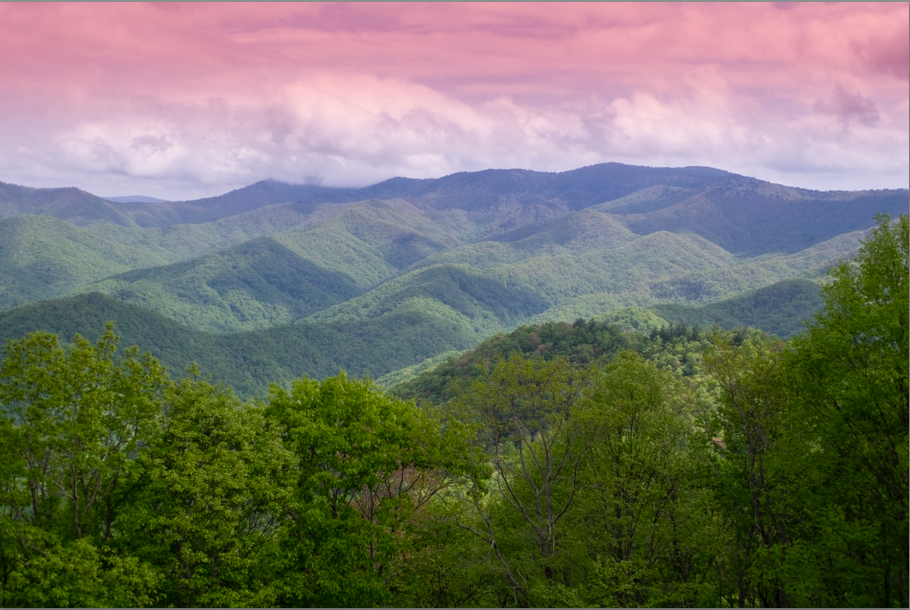
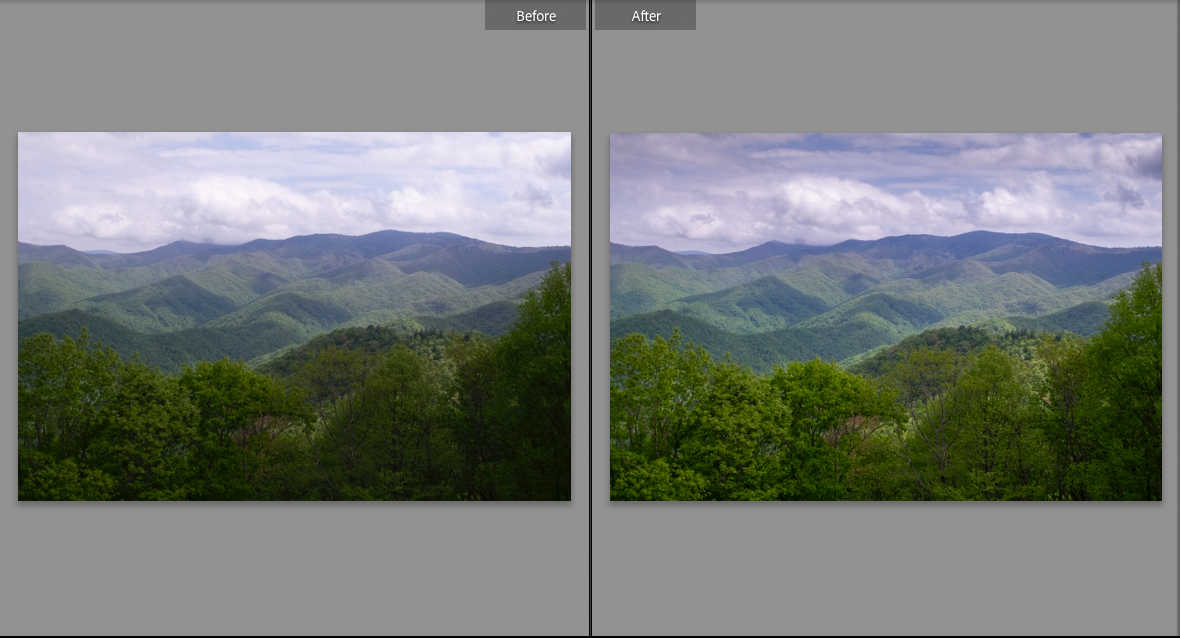
The adjustments you made to the masked areas are applied to the image. The adjustments I made to this image, makes the sky look more realistic, and there’s more detail to the trees in the foreground.
12. In the HSL panel, click Luminance, then click the Targeted Adjustment Tool (it’s the small concentric circle in the upper left corner of the panel).
After you click the tool, it sprouts an up and down arrow. Drag the tool inside the image to adjust a tonal value.

13. Click the Targeted Adjustment Tool (affectionately known as TAT) inside the blue part of the sky and drag down.
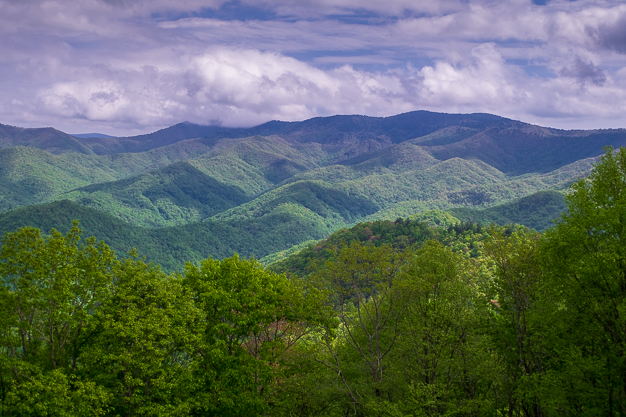
This decreases the luminance of blue colors in the image, effectively darkening the sky.At this stage you could export the image, of choose a different profile to suit the image. In this case, I chose Adobe Landscape. The finished image definitely looks like the scene I photographed.
To learn more about Profiles, read this blog post: Adobe Lightroom Profiles
Recent Comments